Monday, November 26, 2012

Spicing Up Encounters: The Run-Away Wagon

          Sometimes you get into a fight on the back of an out of control wagon.  And sometimes that out of control wagon is headed straight for a cliff.  I know, I know, no need to explain, these things happen.

          Here's how to play it.

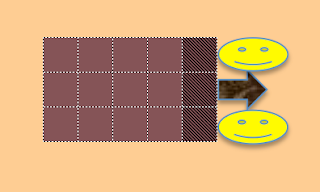
          The Wagon is a 3 by 5 rectangle.  Yes, 15 by 25 feet is a little extreme for a wagon, but otherwise we wouldn't have enough room to fight.  The row by the horses is considered difficult terrain, as there is a seat for the driver there.

          The horses need to be modified a little bit too.  There are two horses to this wagon, but having two large creatures isn't really going to cut it in terms of spacing or realism.  Use the horse statistics, but make them one square by 2 squares.  Sacrilege, I know, but it makes far more sense conceptually.

          Throughout the encounter, the wagon is traveling at 40 mph, or about 360 feet per round.  Obviously, just draw the wagon on the battle grid.  The cliff is 1,800 feet away from the start, or 5 rounds.

The Ride

          The ride, and thus the encounter, is going to be 5 rounds long.  At the end of the 5th round, the wagon will plummet off the cliff.

          The fight proceeds much like any other fight does, but in much smaller quarters.  Casters suffer a concentration check for vigorous motion (10 + spell level), but other than that things are normal, if a bit cramped.

          At the end of the Second Round and the end of the Fourth Round, the wagon will hit a bump.  All those on board must make an Acrobatics 15 check or fall prone.


Stopping The Wagon

          Players adjacent a horse can make Handle Animal 20 checks to calm it. Both horses must be calmed to have any effect.  If both check are made before the fifth turn, then the horses stop before the cliff.  If both checks are made on the fifth turn, then it is too late to slow down and the wagon will still plummet over the edge.

          If either horse dies, or the wagon is dealt some cataclysmic or unbalancing blow, the wagon immediately crashes.  If the wagon crashes, all players are thrown from the wagon, and are dealt the appropriate damage.  They are dealt an additional 3d6+10 damage (Reflex 20 halves) from the wagon splintering apart.

          The horses are connected to the wagon by a thick wooden pole, or "tongue," that runs between them.  If this can be severed before the fourth turn, then the wagon will stop before the cliff.  If the tongue is severed on the fourth or fifth turn, then it is too late and the wagon will not slow down in time.  Because of the vigorous motion of the wagon, the tongue is treated as a wooden object with Armor Class 14, Hardness 5, 20 hit points, and a break DC of 23.


Falling off the Wagon

          If characters fall or jump off the wagon, they are dealt damage as if they had fallen 50 feet.  Characters may use acrobatics to mitigate this damage using the falling rules.

          Each round the wagon moves 360 feet, so any character that falls off the wagon is effectively out of the combat.  However, if multiple characters fall off the wagon, it is possible for them to engage in combat, given that they fall off the wagon on the same round.  Draw a separate battle grid for them to engage.


Falling off the Cliff

          Falling off the Cliff is a really bad option.  You should always warn the characters on the 5th round that they either should jump off the wagon now, or they are going off the cliff.  The cliff is 100 feet tall, but the added forward momentum of the wagon yields damage as if the characters had fallen 110 feet.  Additionally, the wagon splinters and breaks upon impact, dealing 3d6+10 (Reflex 20 halves) damage to anybody who remained on it.  Overall, this can amount to 14d6+10 damage: on average, 60 damage.


Sunday, November 25, 2012

Spicing Up Encounters: The Disintegrating Battlefield

        The Disintegrating Battlefield is a fairly simple way to spice up an encounter.  It's easy to run, can apply to a variety of situations, and can make a fight far more interesting.  In a Disintegrating Battlefield encounter, the usable squares shrink as the battle goes on.

        There are many variations of the encounter, but I will list three.  Feel free to mix and match elements of each.

Lake of Lava

        Our heroes approach a boss-man who has made his home in a volcano.  They have figured out how to deal with the environmental hazards, fought through the dungeon, and make their way to the lake of lava in the center.  The boss-man waits on a island of rock in the middle of the lake, and our heroes make their way across a thin bridge to the island.  The island is a circle with a radius 7.

        Once the battle begins, the boss-man shows off his magical connection with the lava.  The bridge connecting the island to the main land breaks away.  At the start of each of his turns, the boss man takes a free action to crumble 10 squares of island away into the lava.  He (i.e. the GM) chooses these squares, but they must be squares that were already adjacent to lava at the start of his turn.  Any character who is standing in one of these squares can make a reflex save 15 to fall prone in an adjacent square.  Once the boss-man is defeated, the island stops crumbling away, and the land bridge re- solidifies.


On A Spire

        Our heroes have somehow found themselves on a spire thrust up from the earth.  Perhaps they were deposited there, perhaps the earth was thrust up with them.  The Spire is a circle with a radius of 8.  At the bottom of the initiative order on each round, the outermost ring of the Spire breaks off.  Anybody on one of the squares that breaks off may make a reflex save 15 to fall prone in an adjacent square.


On A Raft

        Our heroes find themselves on a raft with an enemy or few.  After placing the enemies, place some number of sharks or other aquatic enemies in the waters around them, ready to grab any morsels of meat that fall off.

        The raft is an 8 by 8 square.  At the end of each round of combat, roll a d4 to randomly choose a side of the raft.  All squares along that side of the raft break off and instantly sink.  Any characters on the squares that break off may make a reflex save 15 to fall prone in an adjacent square.

        Once the fighting stops the raft is no longer under stress, and pieces stop breaking off.


Friday, November 23, 2012

Spicing Up Encounters: The See-Saw

        Disclaimer:  This encounter gimmick is silly.  So silly that your players may titter in glee as they play it.  However, silly isn't always a bad thing, and it can often spice things up.

        The See-Saw encounter takes place on, you guessed it, a gigantic See-Saw over a deep pit.  Our heroes are deposited on one end of the See-Saw, and enemies (of equal weight), are placed on the other end.  Our heroes must defeat their enemies, but take care not to overturn the entire device, sending everybody on it tumbling to the hard ground below.

Setting up the Encounter

        When our players first enter the See-Saw room, there is a large stone wall that divides the room in half along the fulcrum (center) of the See-Saw.  This wall divides our heroes from their enemies, but also keeps the See-Saw flat regardless of weight distribution.  There is a rather prominent switch near the wall which will cause it to rise, reveal the enemies on the other side, and destabilize the See-Saw.  To either side of the See-Saw is a 50 foot pit.  If the players just have torches they will not be able to see the bottom of the pit, as torchlight extends 40 feet.  As soon as the switch is pulled, roll initiative.

        In general, you want to place enemies with a similar composition to the party on the other side - medium creatures, a mix of ranged and melee, and the same number as there are heroes.  Feel free to deviate from this, but not too much.  If you place four ranged large creatures on one side of the See-Saw, then it is almost guaranteed to overturn within three rounds.  Also, you are probably going to want to use constructs or undead - who else would just be hanging out on a gigantic See-Saw?

Balancing the See-Saw

        Every character on the See-Saw is given an approximate weight.  Medium characters weigh 1, Small characters weigh 1/8th, and large characters weigh a whopping 8.  Each size category increases or decreases weight by a factor of eight (as the unit is twice as wide, long, and tall as his compatriots: 2 x 2 x 2 = 8).  It should be mentioned that dead bodies stay where they are, and still count for weight.  Weight on the 5 foot width of the fulcrum do not count for weight on either side.

        At the start of each round after the first, tally the weight on each side of See-Saw.  If one side has more weight than the other side, the See-Saw tilts in that direction, and is considered "Tilted."  Tilting the See-Saw in the opposite direction results in it become "Flat" for the next round.  If the See-Saw is "Tilted," and then tilts in the same direction, it becomes "Severely Tilted."  One more tilt in that same direction, and the See-Saw over turns, breaks, and all character fall to the ground.

        Let's have an example.  Round One:  The See-Saw is flat, as it will always be for round one.  Round Two:  More weight is on the West side, so the See-Saw is "Tilted" West.  Round Three:  More weight is on the East side, so the See-Saw goes from "Tilted" West to "Flat."  Round Four:  More weight is still on the East side, so the See-Saw is "Tilted East."  Round Five:  More weight is still on the East side, so the See-Saw is "Severely Tilted East."  Round Six:  At the start of this round, more weight was still on the East side, so the See-Saw overturns.

        Any round that the See-Saw is "Severely Tilted," all characters on the See-Saw suffer a -2 penalty to attack rolls, skill checks, and concentration checks.  Spell Casters must make a DC 10 + Spell Level Concentration Check (vigorous motion) to cast spells.  Additionally, all loose items (such as dead bodies) roll 4 squares downhill.  Any bull rush attempts downhill gain a +5 bonus, and any bull rush attempts uphill incur a -5 penalty.

        If the See-Saw ever goes from "Tilted" to "Severely Tilted," all characters on the See-Saw must make a DC 10 acrobatic check or fall prone and slide one square downhill (if possible).

        If the See-Saw overturns, then all characters on the See-Saw instantly fall down to the bottom of the pit and are dealt the appropriate fall damage.  Those on the lower half of the See-Saw fall 30 feet, those on the higher half fall 70 feet.  They must then make an immediate reflex save to dodge the pieces of See-Saw as it comes crashing to the ground.  The See-Saw pieces deal another 5d6 damage, but a DC 18 reflex save halves this damage.  After the battle is over, the survivors can climb up a ladder to the exit of the room.

Clean Up

        After the battle, if they have not fallen, our heroes will find themselves on a still swaying See-Saw.  There are a few ways to get to the exit without overturning the See-Saw.  They can simply all run across, and hope that they all make it before the See-Saw overturns.  They can drag some dead bodies around to counterbalance themselves.  Or they can tilt the See-Saw in the wrong direction, then mosey along over as the See-Saw rights itself.  In any case, it shouldn't be too difficult, although looting the bodies may take a little bit more thinking.


Optional Rule - Torque

        In real life, we would have to use a complicated formula to determine exactly how much force each weight exerts.  We can get a little bit closer to that, but not give ourselves a headache, by factoring in distance from the fulcrum.  Simply double to effective weight of any person more than 5 squares from the fulcrum. If you use this rule, you may want to tell your players about it.


Optional Rule - The Monster at the Bottom

        If you want to spice things up even more, you can add a monster at the bottom of the pit. This monster will attack both parties if the See-Saw falls.  It should be big, imposing, and strange - perhaps a tentacle monster or eldritch horror.  Scatter some skulls around for good measure, and be sure to scare the heroes should they see it.  However, the monster should have no ability to effect the fight above, nor bring the heroes down should the See-Saw remain stable.


Monday, November 19, 2012

More Interesting Traps: The Golden Idols

Golden Idol Trap

         The Golden Idol trap is designed to pit character survival against character greed.  Each character is presented with a valuable, but heavy, golden idol.  When the group suddenly finds itself in a vast pool of water each party member has to decide - keep the golden idol and struggle to stay afloat, or drop the idol and get away scot free.

         The Golden Idol Trap is designed for an APL of 2 - 4, although the same trap can easily be applied to characters up to level 8 or 9 (simply increase the worth of the idols).  It can also be easily adapted to an aquatic campaign.  Simply ignore the room and place the four Golden Idols in a derelict ship - a ship that sinks once the trap is activated.

The Room

         The Golden Idol Trap takes place in a very large room.  The room is square, 180 feet by 180 feet, the walls made of slick, DC 30 climb stone.  The room is filled partially with water, water that extends a whopping 600 feet down into the black abyss.  Above the water there is a cavernous hundred feet to the ceiling.

         Over the water, extending from the entrance of the room on one side to the exit on the other side, is an iron bridge 20 feet in width.  The bridge is anchored to the wall near the entrance and exit by a pair of chains.

The Idols

         In the exact center of the bridge there are four Golden Idols of a dungeon appropriate theme - perhaps dragons, perhaps gods, perhaps dwarven sculptures.  If you have fewer than four PCs, simply place that many idols, or explain that some number of the idols are missing.  The worth of the idols is immediately apparent - A simple DC 10 appraise check values them at 1,500 gp each, or about half of the expected level three PC wealth.  They have no magical aura to them - this trap is purely mechanical.  If you are playing with encumbrance, each idol has a weight of 25 pounds.

        Each Golden Idol is on a pedestal. Any player attempting to remove any of the idols finds that it has some give, but it is rooted pretty firmly on the pedestal.  Tell the player that when he moves his idol, the one next to it seems to jiggle.  If more than one idol is lifted at the same time, each idol has more give.

        In order to remove all four idols, all four idols must be pulled up at the same time.  If the PCs have a tough time figuring this out, then drop a hint to any trapfinders that this might be the case.  Pulling out all four idols requires 4 simultaneous strength 6 checks.  There is no penalty for failure, so the PCs may try as many times as they like.  As soon as all four idols are removed, the trap is activated.


The Trap

         As soon as all four idols are removed, the chains holding the bridge in place fall away.  This correlation is only visible if somebody inspects the underside of the bridge and makes a DC 20 Perception check.  The bridge, being made of iron, immediately falls into the water and starts sinking.  Roll initiative.

         Now is an excellent time to point out that the idols look very valuable, and would probably fetch a pretty penny - but they are weighing the characters down.

         The heroes suddenly find themselves 90 feet from the nearest land (the entrance or exit).  Those without idols can make swim checks as normal.  They can use a move action to make a DC 10 swim check to move a quarter of their base move speed, either horizontally or vertically.  Failing by more than 5 results in going underwater.

         Those with idols have a much more difficult time, and cannot take ten on their swim checks.  They may spend a move action to make a DC 20 swim check to move a quarter of their base move speed either horizontally or vertically.  Scoring a 15 - 19 results in no progress.  Scoring a 14 or less on this check results in the character moving 15 feet straight down through the water.  Keep careful track of how far characters have fallen - they will have to swim back up if they want to survive!  Characters may drop idols as a free action - once the idol is out of their hands, it falls 150 feet a round until it hits the bottom of the pit.  Normal drowning rules apply.

         It should be noted that for each Golden Idol a character holds beyond the first, the DC for his swim checks increases by 10.

         Characters will attempt many things to help their allies.  These methods should be encouraged and rewarded.  Getting in and swimming with them, or otherwise physically helping them from the water, acts as an aid another check swim check.  If a character on land throws a rope to a character in the water, he can make strength DC 15 checks to pull the character 15 feet.  Your players will try interesting and creative methods to save each other, so come up with mechanics on the fly!


In Conclusion

         So there you have it.  The Golden Idol trap will force player to choose between wealth and their own well being.  Many characters, after sinking down to a dangerous level, will drop their idols and swim to the surface.  But some will come away scot free, and a heck of a lot richer.


Friday, November 16, 2012

7 Creative Uses for the Handle Animal Skill

In a previous post, I've talked about the importance of variety in your game (Ensuring GM Variety).  However, it can be difficult to come up with new and interesting ways to use some skills.  Here are 7 creative ways to confront your players with the Handle Animal Skill.

Bad Alarm Dog:  Gee, it sure would be great if we could get into the mansion without the guard dog raising an alarm.  Just throwing them a steak won’t do it.  Somebody has to pacify the dog.  DC 25, with a modifier based on the quality of any treats you have brought, +1 to +5.

A Boy and his Dogs:  A street urchin has learned to take control of a pack of wild dogs, and he attacks you with them!  You may either fight against the odds, or take full round actions to make handle animals checks.  A 12 stuns the nearest dog for one round, and every additional three points that you get on your check stuns an additional dog.  Stunning a dog for two rounds in a row will cause him to lose interest in fighting.  If there are no dogs left, the boy gives up.  Be careful though!  Killing the boy will send any remaining dogs into a rage, giving them each +2 strength and +2 constitution.

 The Dog and his Keys:  Prison, yet again.  The guard has left the keys dangling tantalizingly on a hook that is protected from low level spells such as mage hand.  However, the guard’s dog is wandering about the prison.  Can you convince the animal to get the keys?  DC 25.

              Follow the Scent:  The murderer left few clues, but he did leave a sock with a particular odor.  Nobody in the party has noses this keen, but the town bloodhound could certainly use it to track. The only question is, can you communicate well enough to convince the dog to do it?!  DC 10 if the hound is trained, DC 25 if he is not.

              The Friendly Pod:  Well, you and your party have found yourself, for one reason or another out at sea without a boat.  You will drown before long … but here comes a pod of dolphins!  They seem friendly enough.  Make a DC 15 check to convince the dolphins to take your crew to shore (followED by a DC 10 ride check to stay on!)

The Turncoat Gorilla:  An enemy has trained some wild beast to fight for him.  And yet, you look into the beast’s eyes, and see that he has been mistreated.  Make a Handle Animal check to convince the gorilla to switch sides.  A DC 20 Check will break him loose of his mental chains and convince him to attack his master.

Your Rival’s Rodeo:  Your Rival is prancing down the street on his magnificent, well trained stallion.  Wouldn’t it be awesome if the jerk was thrown and wound up in the mud?  You’re going to try to subtly agitate the horse, in ways that only a true animal handler knows.  Make a handle animal check versus your Rival’s ride check to get the horse to buck him!


Thursday, November 15, 2012

The Comprehensive Pathfinder Guides Guide

We Be Dragons
The Newest Module from Zenith Games. Soar the Skies as a Dragon!

Want a Dungeon at Every Level from 1 to 13?

Here is the Guide to the Builds
A repository for all of the best builds out there.

Bookmark this Page and Send it to Your Players and Co-Adventurers!

Core Classes

Alchemist
      * Zenith's Guide to the Alchemist, Part I, II, III, IV, V [Discussion] *  (2015)
      Chasing the Philosopher's Stone: N. Jolly's Guide to the Pathfinder Alchemist [Discussion] (2015)
      Becoming Oozymandias - A Guide to the Bottle Ooze Discovery [Discussion] (2017)
      Ogre's RPG Stuff - Alchemist’s Guide (Core, APG, UM) [Discussion] (2013)
     Preserves and Pointy Sticks: A Guide to Reach Fighting with the Preservationist Alchemist [Discussion] (2018)

Arcanist
      Arcanist Optimization Guide [Discussion] (2014)
      Dawar's Guide to the Arcanist [Discussion] (2015)
      "Blow Them to Smithereens" AKA "There WAS a Boss" [Discussion] (2016)
      Counter Savant: The Only Pathfinder Counterspelling Build [Discussion] (2018)
      Magic Beyond Magic: Iluzry's Guide To The Pathfinder Arcanist (2022)

Antipaladin
      Bodhi's Guide to the Optimal Paladin & Antipaladin (Core, APG, UM, UC) (Has Mythic Options) [Discussion] (Survey) (2015)
      Marshmallow's Guide to Your Optimal Anti-Paladin (2013)

Barbarian
      Anger Management: A Pathfinder Guide to the Barbarian by Novamurmson (Thread) (2014)
      BARBARIAN AM SMASH - A Practical Guide to Breaking Faces by Trinam (Core, APG, UC) [Discussion] (2013)
      How to Become the Lord of Rage: N. Jolly's Guide to the Pathfinder Barbarian [Discussion] (2014)
      Elewan's Pathfinder Barbarian Guide (Core, APG) [Discussion] (2012)
      kcmorris's A Guide to the Barbarian and Titan Mauler Barbarian (Blog) (2011)

Bard
      All the World’s a Stage, and You the Stage Director: A Guide to the Pathfinder Bard (Core, ACG, APG, ARG, UC, UM) [Discussion] (2015)
      Treantmonk's Guide to Bards: Pathfinder Core Rules (Core only) [Discussion] (2012)
      kcmorris's Dervish Dance Bard (Blog, short) (2016)
      Guide to the Buffer Bard [Discussion] (2014)
      Forger's List of Amazing Bard Options (2017)
      The Show Must Go On: Iluzry’s Guide to the Pathfinder 1e Bard (2022)

Bloodrager
      Raining Blood: The Bloodrager's Guide to Pleasing the Metal Gods [Discussion] (2014)
      CTP's Guide to the Bloodrager (2017)
      One B.A.M.F's Guide to the Bloodrager (2018)

Brawler
      Happy Feet, Wombo Combo [Discussion] (2016)
      Brawlers: Debuffing with Style [Discussion] (2016)

Cavalier
      The Cavalier's Code (Core, APG, UM, UC) [Discussion] (2015)
      The Flying Pincushion: GM_Solspiral PAP Cavalier Guide [Discussion] (2014)
      Demi-Lancer: A Guide to Dipping Cavalier for a Mount [Discussion] (2020)
      The Cavalry Has Arrived [Discussion] (2021)

Cleric
      Tark's Big Holy Book of Clerical Optimization (Core, APG) [Discussion] (2014)
      Brewer's Guide to Reach Clerics [Discussion] (2010)
      Pupsocket's Guide to Dipping Cleric (2014)
      Ia! Ia! Cthulhu Ftagn! A Guide to the Elder Mythos Cultist [Discussion]
      Rogue Eidolon’s Guide to Clerics (Domains) (Core only) [Discussion] (2010)

Druid
      Peterrco's guide to Druids (Core, APG, UM, UC) [Discussion] (2012)
      Treantmonk's Guide to Druids Part 1, Part 2, and Part 3 (Core only) [Discussion] (2010)
      I'll Be Back.  The Guide to the Reincarnated Druid [Discussion] (2014)
      Druid's Log: Animal Companions [Discussion] (2014)
      Prometeus Guide to the Druid [Discussion] (2016)
      Monk Dipping for Pathfinder Druids [Discussion] (2015)
      Becoming A Force of Nature: Iluzry’s Guide to the Pathfinder 1e Druid [Discussion, Discussion] (Jul 2021)
      Faerie Tricks & Big Sticks: Iluzry’s Guide to Druid Spells & Spellcasting (Nov 2023)

Fighter
      Bladestorm: "STR Ranger"'s Guide to TWF for Fighters (Core, APG, UM, UC, SoS) [Discussion] (2013)
      kcmorris's A Guide to the Fighter (Blog) (2015)
      Rogue Eidolon's Guide to Fighters (Core only) [Discussion] (???)
      Two Hands are Better Than One: A Guide for Fighters Using Two Hands [Discussion] (2016)
      Secrets of the Swordlord: A Guide to the Aldori Dueling Sword [Discussion] (2013)
      Huh, Fighters Are Pretty Awesome: Nightbringer's Guide to the Pathfinder Fighter [Discussion] (2016)
      Cartmanbeck’s Guide to the Iron Caster (2017)
      Marshmallow's Guide to the Pathfinder RPG Fighter [Discussion] (2017)

Gunslinger
      Drake_Rocket's Guide to Grand Gunslinginger Greatness (Core, APG, UC) [Discussion] (2011)
      kcmorris's Musket Master Gunslinger (Blog, short) (2016)
      The Gunslinger's Handbook (2012)
      Lokotor's Gunslinger Guide [Discussion] (2016)
      Surpassing Even the Boss: N.Jolly's Guide to the Pathfinder Gunslinger [Discussion] (2016)

Hunter
      A Guide to the Pathfinder RPG's Hunter [Discussion] (2016)
      Guide to the Outflanking Hunter [Discussion] (2018)

Inquisitor
      Bodhi's Guide to the Optimal Inquisitor (Core, APG, ARG, UM, UC, Other+) [Discussion] (2015)
      Nobody Expects a Guide to the Inquisitor (Core, APG, UM) [Discussion] (2014)
      The Inquisitor's Symposium: A Guide to the Pathfinder Inquisitor (2019)
      The Inquisitorʼs Symposium Redux: A (New) Guide to the Pathfinder Inquisitor (2022)

Investigator
     The Investigator’s Academy: A Guide to the Pathfinder Investigator [Discussion] (2020)
     Being Sherlock Holmes: A Gentleman's Guide to the Investigator [Discussion] (2015)
     The Investigator's Grand Turnabout: N. Jolly's guide-addendum to the Pathfinder Investigator [Discussion] (2016)
     Elementary! A Handbook to the Pathfinder Investigator (2014)

Kineticist
      Mastering the Elements: N.Jolly's Guide to the Pathfinder Kineticist [Discussion] (2016)
      Sucking Counts as Airbending, Right? (Thread) (2015)
      Aetherialist AKA Telekenticist (2015)
      Pyrokineticist (2016)
      The GM's Guide to the Kineticist [Discussion] (2017)
      Mort’s Guide for Kineticist Dipping and Dipping Kineticist [Discussion] (2019)
      A Useful Guide for Useful Kineticists (Thread) (2017)
Magus
      Optimizing the Suboptimal: A Subguide to the Myrmidarch (2012)
      A Guide to Touch Spells, Spellstrike, and Spell Combat (2012)
      Magus Hexcrafter Guide: The Complete Guide For Dealing With The Devil (Core, APG, ARG, UC, UM) [Discussion] (2013)
      Walter’s Guide to the Magus (Core, APG, UM) [Discussion] (2011)
      The Exhaustive Guide the the Kensai Magus [Discussion] (2012)
      Myrrh, Frankincense, and Steel: Kurald Galain's Guide to the Magus (Core, APG, ARG, UC, UM) [Thread] [Discussion] (2017)
      Forger's Supplemental Guide to the Updated Magus (2014)

Medium
     Leasing Your Body for Fun and Profit: CockroachTeaParty's Guide to the Pathfinder Medium [Discussion] (2017)
     Guide for the Medium Occult Class [Discussion] (2018)

Mesmerist
      The Grandeur of Illusions - A PF Mesmerist Guide (2015)
      Quark's Thoughts on the Mesmerist (2021)
      Follow My Voice: A Guide to the Pathfinder Mesmerist (2022)

Monk
      Porpentine's Guide to Zen Archery (Blog) (2013)
      A Guide to the Qinggong Monk (Short, Blog) (2014)
      Optimizing your Qinggong Monk (Short, Blog) [Discussion] (2017)
      kcmorris's Zen Archer Monk (Blog) (2012)
      Revel's Guide to the Monk (Core, APG, UM, UC) [Discussion] (2011)
      Treantmonk's Guide to Monks (Core only) [Discussion] (2016)
      Zen Archer Handbook (Thread) (2012)
      Way of the Angry Bear 3: Bear Fisted Fighting (Monk/Druid Multi-class) [Discussion] (2015)
      The Beginner's Basics to the NEW Master of Many Styles [Discussion] (2016)
      Jam's Blended Archetype Guide: The Monk [Discussion] (2016)

Monk (Unchained)
     You are Already Dead: A Guide to the Unchained Monk [Discussion] (2017)

Ninja
      * Zenith's Guide to the Ninja Part I, Part II, Part III & Part IV [Discussion] * (2015)
      Death from the Shadow: A Guide to the Ninja by Joseph Bucceri (Core, APG, UM, UC) [Discussion] (2014)

Occultist
      The Occultist's Reliquary A Guide to the Pathfinder Occultist
      One Man's Junk is Another Man's Power (2015)
      Implementing Magic: VampByDay's guide to the Occultist [Discussion] (2016)
      Rekijan's Guide to Trappings of the Warrior (2017)
           More Occultist Options

Oracle
      Channeling the Cosmos: A Guide to the Oracle (Core, APG, ARG, UM, UC) [Discussion] (2014)
      Brewer's Guide to the Jargonaut (Words of Power Oracle) [Discussion] (2013)

Omdura

Paladin
      Bodhi's Guide to the Optimal Paladin & Antipaladin (Core, APG, UM, UC) (Has Mythic Options) [Discussion] (Survey) (2015)
      Cryptic's Guide to the Pathfinder Paladin: Being a God's Wrecking Hammer (Core) [Discussion] (2012)
      Thallin's Guide To Paladins (Optimization) (Core, APG) [Discussion] (2009)
      Oradin Mini-Guide, or How to be a Healbot minus the 'bot' (Thread) (2014)
      The Paladin's Code and Pathfinder (Roleplaying the Paladin) [Discussion] (2014)
      Deadeye's Servant: A Guide to the Archery Paladin [Discussion] (2014)
      The Mini-Guide to the Iroran Paladin [Discussion] (2014)
      Guide to the Paladin through the eyes of a D&D 3.5 Player (Thread) (2014)
      Smite Optimization (Thread) (2011)

Psychic
     Think it, And So it Shall Be: CTP's Guide to Psychics (2017)
     A Pathfinder Guide to the Psychic (2015)
     There Is No Spoon: Iluzry’s Guide to the Pathfinder 1e Psychic (2023)

Ranger
      Ginsu Master: A Ranger’s Guide to Two Weapon Fighting (Core, APG, UM, UC) [Discussion] (2011)
      Lastoths Guide to Archery Rangers (Core, APG, UM, UC) [Discussion] (2012)
      Treantmonk's Guide to Rangers in Pathfinder (Core only) [Discussion] (2009)
      Seeing The Forest through The Trees [Discussion] (2021)

Rogue
      Moxie: A Practical Guide to Roguing with Style [Discussion] (2014)
      kcmorris's Guide to the Rogue (Blog) (2012)
      kjb200's Update to Rogue Eidolon's Guide to the Rogue [Discussion] (2015)
      Bravo's Knife Master Scout Guide [Discussion] (2013)
      Rogue Eidolon's Guide to Rogues (Core, APG) [Discussion] (2010)
      A Guide to the Pathfinder Rogue [Discussion] (2014)
      GM_Soulspiral's PAP Rogue Guide (2013)
      "You're Such a Sap!" A Step-By-Step Guide to the Revised Sap Master [Discussion] (2017)
      Forger's List of Awesome Stuff for Rogues (2017)

Rogue Unchained
      CTP's Unchained Rogue Mini-guide (Thread) (2015)
      One Thousand Years of Death: A Guide to the Unchained Rogue (2017)

Samurai
      Way of the Samurai (Core, APG, UM, UC) [Discussion] (2012)
      The Cavalry Has Arrived [Discussion] (2021)

Shaman
     The Seer's Catalog [Discussion] (2016)
     Spiritual Attunement: A Pathfinder Shaman Guide by JBurz [Discussion] (2015)
     Friends On The Other Side: Iluzry’s Guide to the Pathfinder 1e Shaman (May 2022)
     The Shaman: The One True Generalist (Mar 2023)

Shifter
     Archmage Variel's Guide to the Shifter [Discussion] (2018)

Skald
      How to be Metal [Discussion] (2016)


Slayer
      A Study of Slayers [Discussion] (2015)
      The Art of Omnicide: Iluzry’s Guide to the Pathfinder 1e Slayer (2022)

Sorcerer
      The Inner Power: A Guide for Sorcerers (Core, APG, UM, UC) [Discussion] (2012)
      A Quick Guide to Pathfinder Sorcerers: Gods Don't Need Spellbooks (Core, APG, UM, UC) [Discussion] (Recovered Build Page) (2013)
      Magic in the Blood: A guide to Eldritch Heritage and Sorcerer Bloodlines (Core, APG, ARG, UM, UC) [Discussion] (2015)
      The (almost) Complete Guide to Sorcerers - A Practical Handbook (Core only) [Discussion] (2009)
      Thus She Spoke: The Words of Power Sorcerer [Discussion] (2013)
      Sorcerer Nuke/Blast Guide for Pathfinder Society (2015)
      Unlimited Mageworks: Iluzry's Sorcerer Guide [Discussion] (2021)

Spiritualist
     Phantom of the OP-era: A Guide to the Pathfinder Spiritualist [Discussion] (2017)
     Eternal Servitude: Guide to the Spiritualist [Discussion] (2016)
     Two Minds are Better than One (A Short Discussion of the Spiritualist Dip) (2015)
     Spirits of War: A Guide to the Phantom Blade Spiritualist (2018)
          More Spiritualist Options

Summoner
      Summoning Information - A Guide to an Alternate Eidolon (2013)
      The Summoner's Handbook (Core, APG) [Discussion] (2011)
      Tark's Guide to Building Tag Team Champions: (Melee Summoner) [Discussion] (2012)
      Getting into Some Else's Skin:  N. Jolly's Guide to the Synthesist Summoner [Discussion] (2015)
      Summoners - Specialist Sorcerers with a Party of Their Own  (2017)
      Monster's at your Knees - Orthodox Banjoist's Guide to the Summoner (Update to the Summoner's Handbook) [Discussion] (2015)

Summoner Unchained
     Unchained Summons [Discussion] (2015)

Swashbuckler
     The Dashing Daring Dandy's Dragoman [Discussion] (2015)

Vampire Hunter
     Archmage Variel's Guide to the Vampire Hunter (2018)

Vigilante
      I am Vengeance, I am the Night [Discussion] (2017)
      Meandering Mysticism: Drifter's Guide to the Warlock Vigilante Archetype (2017)
      With Great Power Comes Great Complexity (2016)

Warpriest
      Piercing the Heavens: N. Jolly's Guide to the Pathfinder Warpriest [Discussion] (2016)
      In Totality: The Ultimate Guide to Every Cleric, Oracle, and Warpriest Spell in Pathfinder [Thread(2019)

Witch
      A Witch's Guide to Shutting Down Enemies (Core, APG, UM, UC) [Discussion] (2014)
      Hubble, Bubble, Toil and Trouble. Fire Burn and Cauldron Bubble (Core, APG) [Discussion] (2011)
      Patron's Review (2011)
      The Viking Irishman's Witch Guide (Core, APG, UM, UC) [Discussion] (2013)
      Witch Handbook (Thread) (2014)
      A Guide to the Veneficus Witch [Thread] (2019)
      Owl's Guide to Witches [Discussion] (2021)

Wizard
      THE COMPLETE Professor Q's Guide to the Pathfinder Wizard (Core, APG, ARG, UM, UC) [Discussion] (original) (2013)
      The Blockbuster Wizard (Core, APG, UM, UC) [Discussion] (2013)
      Treantmonk's Guide to Pathfinder Wizards [Discussion] (2009)
      ShakaUVM's Methods for Necromantic Success [Discussion] (2014)
      Wannabe - Orthodox Banjoist's Guide to the Transmuter Wizard [Discussion] (2014)
      The Spellslinger (A Pathfinder Wizard Archetype): A Guide [Discussion] (2014)
      Spell Sage Archetype: Arcane Apotheosis, the True Wizard, Nethys' Favored [Discussion] (2014)
      DMDM's Guide to the Spell Sage (2017)
      Angry Wizard's Guide to the ACG & Other Misc. Wizard Spells [Discussion] (2015)
      Tarondor's Guide to the Pathfinder Transmuter Wizard (2019)
      Staff and Gun - A Miniguide to the Eldritch Gunslinger (2016)
      Making a Living as a Wizard & Part II  [Post] (2019)
      The Muscle Wizard: A Guide to Greatness (2021)
      The Supreme Spellbook: Analyzing Every Arcane Spell [Discussion(2022)

Prestige Classes
Arcane Archer

Assassin

Battle Herald
Champion of Irori

Demoniac

Diabolist

Dragon Disciple

Duelist

Eldritch Knight
      Zolthux's Guide to the Eldritch Knight (Core, APG, UM, UC) [Discussion]

Hellknight
     Hellknight Guide

Holy Vindicator
Mystic Theurge

Stalwart Defender

Rage Prophet

Shadow Dancer

Psionics & Third Party
Aegis
     Armor of the Mind: The Aegis

Conscript
      Conscript Guide

Cryptic
      The Cryptic
      Seeing the Writing in the Walls: A Cryptic Guide [Discussion]

Daevic
      Daevic Guide [Discussion]

Draconic Exemplar
      So You Want to be a Dragon? [Thread]

Dread
      Fear Itself: A Guide to the Dread [Discussion]

Elementalist
      Spheres of Power Elementalist Handbook [Discussion]

Guru
      Guru Guide [Discussion]

Harbinger
     Dark Wings, Dark Tidings: A Guide to the Path of War Harbinger [Discussion]

Marksman
    Marksman Mastery: You Only Get One Shot [Discussion]

Mystic
    Untameable Power: A Guide to the PoW Mystic [Discussion]

Nightblade
     Into the Darkness: A Guide to the Nightblade

Occultist
      Pacting in Pathfinder - The Occultist Handbook [Discussion]

Psion
      Mind Over Everything: A Pathfinder Psion Handbook [Discussion]
      A guide to DSP’s Psionic Powers for the Psions and Wilders

Psychic Warrior
      Jackiscool's Guide to the Psychic Warrior (Core, APG, UM, UC) [Discussion]
      The Psychic Warrior's Handbook (Thread)
      Memory Muscle: The Psychic Warrior Handbook [Discussion]

Sentinel
     Sentinel Guide

Soulknife
      Sharpening the Mind: A Guide to the Pathfinder Soulknife (Thread)
      Mind Becomes Matter: A Pathfinder Soulknife Guide (Thread)

Stalker
      Striking from the Shadows: The Stalker [Discussion] (Thread)

Tactician
      The Chess Master: A Tactical Guide to the Tactician (Thread)

Thaumaturge
      Risky Business: A Thaumaturge Handbook [Discussion]

Vitalist
      Mental Medicine: Psionic Healing Through the Vitalist (Thread)

Vizier
    Vizier Guide [Discussion]

Warder
    Defending the Weak: The Warder [Discussion] (Thread)

Warlord
      Leading the Battle: A Guide to the Warlord [Discussion] (Thread)

Wilder
      Where the Wilder Things Are
      A guide to DSP’s Psionic Powers for the Psions and Wilders

Zealot
     Castilonium's Zealot Guide [Discussion]

Other Useful Guides

Builds
      * Guide to the Builds [Discussion] *
      Ravingdork's Crazy Character Emporium

Race Guides
      * Guide To Pathfinder Races [Discussion] *
      Pathfinder Player Race List (Thread)

Equipment
      * Improving Your Class with Items [Discussion] *
      Good And Cheap Equipment Part 1 and Part 2 and Cheap Ioun Stones and Cheap Wands (Blog)
      The Handy Haversack Pack (3185 Gold and 5 pounds, this sack has everything the adventurer might need)
      The Viking Irishman’s Guide to Weaponry (Core, APG, UC) [Discussion]
      Anzyr's Magic Item Emporium [Discussion]
      Alchemical Items Guide [Discussion]
      Temporary Enhancements to Manufactured Weapons [Discussion] (2017)
      A Guide to Weapons, Armor, Equipment, Alchemical & Magic Items (2017)

General Character Building
      Archetype Tier List: A Guide to Picking Archetypes [Discussion]
      Roguish Quail's Introduction to Classes
      Bench Pressing: Character Creation by the Numbers [Discussion]
      Dipping for Fun and Profit (Thread)
      Getting X to Y: How to make a Attribute do other things (Core, APG, ARG, UC, UM) [Discussion]
      Possible Archetype Combos
      The Big Fat Feat Compendium
      Face_P0lluti0n's Guide to Weapon Finesse [Discussion]
      How to Get a High Armor Class [Discussion]
      Guide for Class Selection [Discussion]
      Playing 101: Guide to Teamwork Feats
      Walter's Guide to Deific Obediences [Discussion]
      X to Y Stat Bonuses (Recovered Thread)
      Getting the Most Out of Your Ability Scores: a Pathfinder 1E Overview (X to Y)
      Categories of Classes [Discussion]

Traits
      Guide to the Very Best Traits [Discussion]
      Tips and Traits: A guide to Pathfinder Traits (Core, APG, UM, UC) [Discussion]

Specific Strategies & Tactics
      Athanatism, Necromancy, and Undead: A new way to make friends (2023)
      The Noble Art of Intimidancy
      Attacks of Opportunity: The Red-Headed Stepchild of Pathfinder [Discussion]
      Mastering Metamagic [Discussion]
      Guide to Maneuvers and Initiating (Dreamscarred Press's Rules)
      An Extraordinarily Thorough Guide on Using Handle Animal [Discussion]
      Guide to Helping Your Rogue do Sneakies and Stabbies

Variant Multi-Classing

Tips & Tricks
      Action Economy: Time Savers (Blog)
      Ashiel's Guide to Adventure: Preparation, Tricks, and Strategies (Core, APG, UM, UC) [Discussion]
      The Forge of Combat: Thoughts on Victory and How the Group Achieves it [Discussion]
      Fueling the Forge: Breaking down Combat Tactics in Pathfinder [Discussion]
      Nephril's Extended Beginners Guide [Discussion]

Summoned Monsters and Animal Companions
      Multiple Animal Companions and You [Discussion]
      Animal Companion Comparison (Blog)
      Spells Your Summoned Monsters Can Cast (Short)
      Summon Good Monster: A Closer Look (Thread)
      Why Work When Others Can do it For You (Monster Summoning)
      Druid's Log: Animal Companions
      Teamwork Feats and Animal Companions (Discussion)
      DMDM's Guide to Planar Binding
      Abusing Animals - A Guide to Sharing Spells with Animal Companions for Non-Druids

Specific Class Abilities
      Abraham Spalding's Guide to the Holy Vindicator (or more specifically channeling) (Core, APG, UM, UC) [Discussion]
      Being a Most Concise and Helpful Guide to the Noble Arts of Wild Shaping and Polymorphing (Core) [Discussion]
      Guide To Spells (Core, APG, UM, UC) [Discussion]
      Polymorphamory - The Love of Changing Form: A Guide to Shapeshifting [Discussion]
      Shadow Conjuration Handbook (Discussion)
      Shadow Evocation Guide (Discussion)
      Abusing Animals: A Guide to Sharing Spells with Animal Companions for Non-Druids [Discussion]
      Word of Power Handbook (Thread)
      The Orrery - A Handbook to the Spheres of Power [Discussion]
      Guide to Familiars in Pathfinder by SunderedShadow [Discussion] (2017)
      A Polymorph Guide: Beast Shape vs. Monstrous Physique [Discussion] (2018)
      The Mage’s Menagerie - Iluzry’s Guide to the Pathfinder 1e Familiars (May 2022)
      I Know Kung Fu: Allerseelen's Guide to Style Feats (Discussion)
      Touching the Cosmos: Caffeine Elemental's Guide to Occult Rituals
      Casters Compared [Discussion] (Mar 2023)

Spheres of Might
      Spheres of Might Handbook (2020)

GM Guides
      Top 10 Tips for GMs
      Brewer's GM Guide to Campaign Design (&dropbox) [Discussion]
      Brewer's Guide to GM Session Structure [Discussion]
      GM's Guide to Creating Challenging Encounters [Discussion]
      Templates and You (Thread)
      Inkarnate - A Map Making Tool

Mythic
      Mythic Guide to Universal Path Abilities [Discussion]
      The Power of the Archmage [Discussion]
      CTP's Guide to Mythic Adventures (Thread)

Play by Post
      DH's Guide to Play by Post Gaming (Thread)
      Building a Better Doomed Hero: Painlord's Advanced Play by Post Play (Thread)
      Painlord's Guide to PbP GMing: Make Your World a Better Place (Thread)
      CampinCarl's Character Creation Guide for Pathfinder Pbp (Thread)

Pathfinder Society
     Flutter's Guide for Pathfinder Society Newbies
     Fame and Fortune: Getting the Most from Your Prestige Points

Guides on Types of Builds
      A Guide to Trip Builds in Pathfinder
      CTP's Guide to Words of Power (Thread)
      Words of Power Handbook by The-Mage-King (Thread)
      Where There's a Whip There's a Way: Amanoo's Pathfinder Guide to Whips
      Cartmanbeck's Guide to the Iron Caster - Using Item Mastery feats to be the ultimate Con-based caster [Discussion] (2016)


General
      Optimizing your GM [Discussion]

PDFs of All Paizo Materials

Great thanks to Harmon's Guide to the Class Guides on the Paizo messageboards, Hallack's Pathfinder Handbook and Handy Links Index on Minmax Boards, Novawurmson's Optimization Guides Compendium on Giant in the Playground, and all the rest.

Archived
Guides here are either no longer accurate or completely eclipsed by other guides. Feel free to look at them for additional points of view, but they may not be correct.

      Professor Q's Guide to the Core+ Wizard (Core, APG, UM, UC) [Discussion] (original) (2012) (Contained within The COMPLETE Guide to the Wizard)
      Way of the Angry Bear 3: Bear Fisted Fighting (Monk/Druid Multi-class) [Discussion] (2015) (Errata makes this no longer viable)
      Axe's Guide to Finding Divinity (2010) (Unfinished & Very Old)